
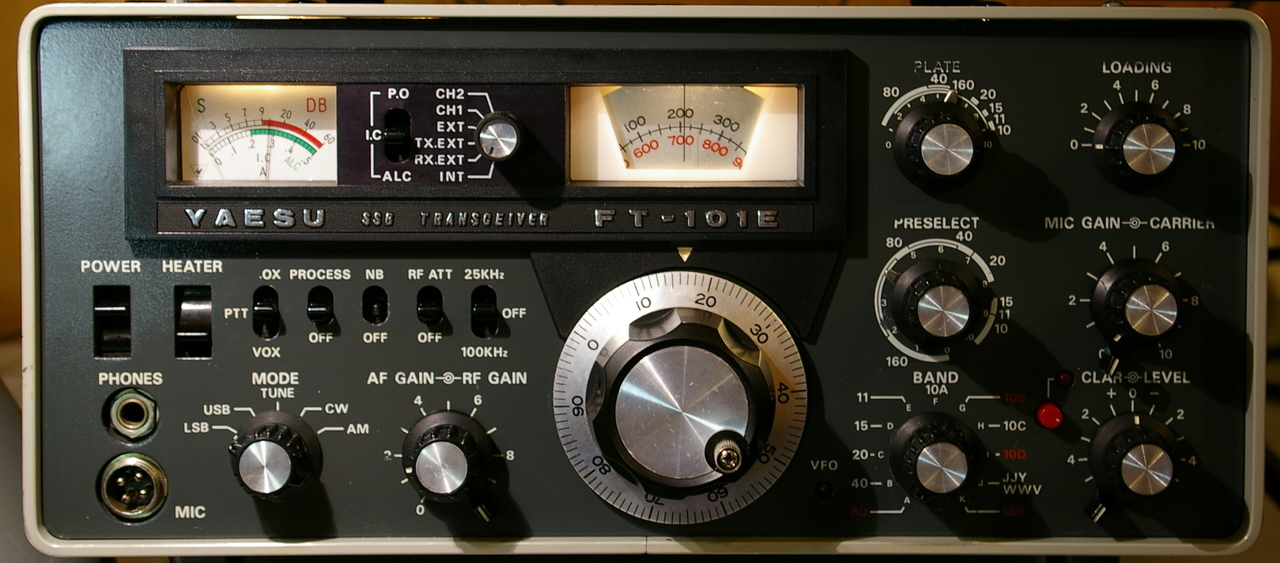
I picked up this FT-101E at a “silent key” sale. I’d been looking for a radio related project and I have fond memories of a Yaesu FT-221 that I had on loan from an “elmer” when I was first licensed, so fancied another Yaesu “boat anchor”…
It came to me in a bit of a state. The previous owner had clearly been a heavy smoker and it was caked in a form of nicotine based varnish inside and out. Some of this had clearly contaminated the switches and pots because, aside from a few crackles when adjusting controls, it was pretty much dead when tested.
A look inside revealed that it was completely free from any obvious repairs or modifications, that it still had its (possibly original) NEC 6JS6C final amplifier valves and that all the power supply rails were present and correct. Having dodged any encounters with the “golden screwdriver” during its 40 year life, it was clearly going to be worth saving.
The radio was so badly contaminated that I felt it required cleaning up before I handled it much more. It really was that bad! I elected to strip it down to a point where it could be properly cleaned – by whatever drastic means I deemed necessary!

The really nice thing about these old Yaesu rigs is that the main PCBs all plug into edge connectors, so they can be readily removed for work or, in this case, cleaning! I removed all PCBs, brushed off the dust and washed them in a solution of alcohol and deionised water. The front panel and all knobs got the same treatment. The valves, relays, speaker and other easily removed components came out and I gave the chassis a good dousing in the deionised water and alcohol. That didn’t quite cut it, and it was, eventually, a metal degreasing solution that proved powerful enough to dissolve the contamination from all internal surfaces, especially the difficult-to-reach areas such as the switch contacts and the plates of the PA tuning capacitors.
The chassis was rinsed thoroughly with deionised water from a spray gun, then excess liquid was blown off with an air line. Finally, the whole thing went in a heated cabinet for a week or two to dry thoroughly before any further testing.

I was very pleased with the results. Capacitor plates that were once clogged with a brown resinous substance were now gleaming like new. It was actually almost as if the nicotine coating had protected the rig from deterioration over the years!
The front panel, fortunately, still had its polythene protective sheet intact, which was beyond saving. I removed this, then cleaned the front panel and applied a couple of coats of clear lacquer to protect it. Finally, all pots and switches were given a squirt of a switch cleaner / lubricant.
The mains lead that came with this radio had only a length of 2 core flex between the 13 Amp mains plug and the Jones plug on the back of the radio. I really wasn’t happy with a mains powered piece of equipment with a steel chassis having no mains earth. Fortunately, one of the pins on the Jones plug connects directly to the chassis, so, I replaced the flex with a length of modern 3 core mains cable providing an earth connection.
On reassembly, the rig showed much more hopeful signs of life. It worked well on receive on most bands, although sensitivity was a bit variable. It would transmit a few watts but SSB audio on transmit was very distorted and it took about 30 minutes of “warm up” time before anything much happened at all!
I found that the resistors (R5, R37) and the capacitor that provide the screen supply to the driver valve had burnt out and replacements started smoking as soon as I turned the heaters on. Turns out the valve, a 12BY7, had some sort of screen – grid short, I think. A replacement valve fixed that.
I found that leakage in the coupling capacitors (C13, C131) between driver and PA was causing the finals standing current to increase when hot. This is a known problem with these rigs and is prone to causing the precious final valves, and, even the mains transformer, to die. Replacement capacitors fixed this.
I puzzled for ages on why the radio wouldn’t work from cold. I determined that the VFO wasn’t running, so narrowed my fault finding to the VFO circuit, which is tucked away in a metal box close to the mechanical components of the VFO. It turned out that a capacitor (C19), whilst measuring OK, was faulty. A bit of freezer spray on it and the VFO stopped (but only after a minute or two, by which time I’d sprayed everything!), so it was not an easy process to track this down. I fitted a replacement 82pf NPO from the junk box and it’s now fine and doesn’t drift as much as previously, either. The capacitor actually tested OK on a capacitance meter once removed, both hot and cold, but it was clearly lossy enough to stop the oscillator when cold.
The Jackson drive on the VFO was a bit slippy, so I replaced this with a new one. They are still available brand new manufactured by a company called Mainline Electronics. All that the new drive required was to shorten the input shaft a little to suit the FT-101 .
Finally, I wondered why the CW sidetone oscillator didn’t work, until I discovered that the heater switch has to be on. Should have read the manual!
I found that the radio needed a good tune-up, with several issues such as the Preselect control peaking in different locations for TX and RX operation so, in the end, I bit the bullet and went through the full procedure as documented in the service manual.
The resulting radio is an absolute delight to use, and it generates full output on all bands. This is just as well, as getting hold of the 6JS6C output tubes, originally designed as colour TV line output devices, is getting very difficult these days.
I have since added a CW filter, which popped up on Ebay recently, and it makes copying CW signals very much easier than with the standard filter that’s shared with the SSB mode.
Current “Best DX” is VP8LP in the Falkland Islands, worked on 20M SSB using a wire dipole in the loft space.
There are a couple of cosmetic issues to resolve. The S-Meter has a cracked cover and the toggle from the noise blanker switch has broken off. I’d also like to re-spray the case and front panel bezel but these will have to wait until I can prise myself away from operating it!